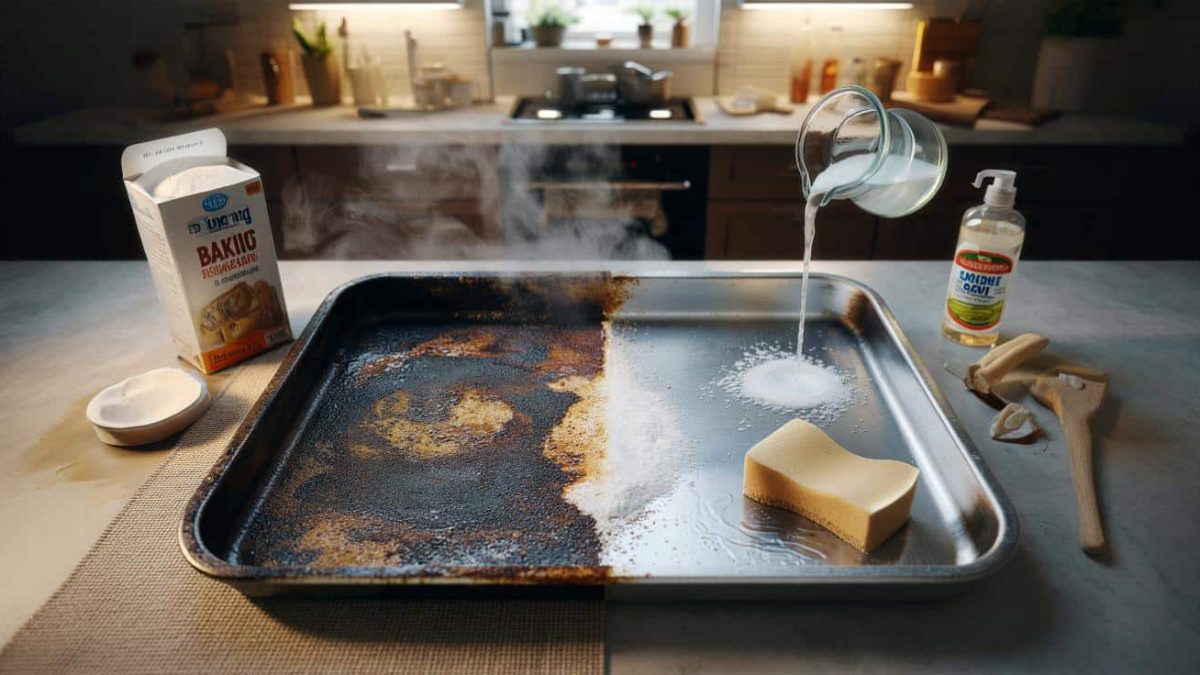
Every passionate baker has experienced the frustration of removing a baking tray from the oven only to discover a thick, blackened crust stuck to the surface. Whether it’s caramelized sugar, burnt oil, or scorched breadcrumbs, these stubborn deposits seem virtually impossible to remove through conventional washing. Most people reach for harsh chemical cleaners or spend what feels like hours scrubbing until their arms ache. But what if the solution has been sitting in your pantry all along?
Why Baking Trays Burn and Stick
Understanding why baking trays become damaged helps us appreciate the chemistry behind an effective cleaning solution. When baking trays are exposed to high heat, food particles undergo a process called the Maillard reaction, creating a dark, crusty layer that bonds firmly to the metal surface. Oils and sugars caramelize at temperatures exceeding 350 degrees Fahrenheit, creating a nearly cement-like substance that ordinary dishwashing won’t remove.
Traditional scrubbing methods often scratch the tray’s surface or prove ineffective because they attack the problem directly without loosening the burnt material first. This is where a gentle, chemical-based pantry mixture becomes remarkably effective—it works on the burnt layer from the inside out, breaking down the molecular bonds that hold it to your baking tray.
The Pantry Ingredients You Need
The beauty of this cleaning method lies in its simplicity. You likely already have everything required in your kitchen without needing to purchase specialized cleaning products. The primary ingredients are baking soda and white vinegar, two pantry staples found in most households. These work synergistically to create a gentle yet powerful cleaning action.
Baking soda, also known as sodium bicarbonate, acts as a mild abrasive and natural deodorizer. Its granular structure helps lift burnt particles without damaging the underlying metal. White vinegar contains acetic acid, which breaks down mineral deposits and burnt organic matter. When combined, these two ingredients create a fizzing reaction that penetrates the burnt layer and loosens it from the tray’s surface.
You’ll also need warm water and optionally, a small amount of dish soap to enhance the cleaning process. These are items virtually every household contains, making this solution both economical and accessible.
The Step-by-Step Method
Begin by filling your sink or a large basin with hot water—not boiling, but hot enough that you can comfortably hold your hand in it. Place the burnt baking tray in the water and allow it to soak for approximately fifteen to twenty minutes. This initial soaking softens the burnt residue and makes the subsequent steps more effective.
While the tray soaks, create your cleaning paste. Combine three tablespoons of baking soda with just enough white vinegar to form a thick, spreadable consistency. The mixture will fizz slightly as the acid and base interact, which is exactly what you want. This fizzing action is what makes the solution so effective at breaking down burnt material.
After the soaking period, remove the tray from the water and use a soft cloth or sponge to apply the baking soda paste directly onto the burnt areas. Don’t scrub aggressively at this stage; instead, work the paste gently into the burnt residue using circular motions. The chemical reaction is doing most of the heavy lifting, not your elbow grease.
Let the paste sit on the burnt areas for another ten to fifteen minutes. During this time, the acetic acid penetrates deeper into the burnt layer, continuing to break down the bonds holding it to the metal. You might notice the mixture darkening as it pulls the burnt material away from the tray’s surface.
The Final Cleaning Stage
Using a non-abrasive scrubbing pad or soft cloth, gently work away the loosened burnt material. You’ll be pleasantly surprised at how easily it comes off compared to your previous scrubbing attempts. The burnt layer should lift away in chunks and powder rather than requiring intense friction.
If stubborn spots remain, simply reapply the baking soda and vinegar paste to those areas and allow another few minutes for the chemical action to work. Repeat this process as needed until the tray’s surface is clean. Most heavily burnt trays require only one or two applications of this method.
Once satisfied with the results, rinse the tray thoroughly under running water to remove all baking soda residue. Dry it immediately with a clean cloth to prevent water spots and ensure the metal dries completely.
Why This Method Outperforms Traditional Scrubbing
The fundamental difference between this pantry approach and aggressive scrubbing is the chemistry involved. Rather than relying on physical force to remove burnt material, this method uses chemical reactions to break down the bonds holding it to the metal. This means less effort on your part and less risk of damaging your baking trays through excessive scrubbing.
Additionally, this method is completely safe for all types of baking trays, whether they’re aluminum, steel, or non-stick coated. Unlike some commercial oven cleaners that can damage non-stick surfaces, baking soda and vinegar are gentle enough for any cookware material while remaining effective enough to tackle serious burnt deposits.
Prevention Tips for Future Baking
While this cleaning method works wonderfully, preventing burnt trays in the first place saves you the effort entirely. Line your baking trays with parchment paper before baking to create a barrier between food and the metal surface. This simple step eliminates most burnt residue issues.
Reduce oven temperature slightly if you notice food browning too quickly during baking. Many ovens run hotter than their displayed temperature, leading to excessive caramelization. Using lower heat and extending baking time often produces better results and cleaner trays.
Additionally, promptly clean any spills immediately after removing trays from the oven while the surface is still warm but manageable. Fresh spills clean far more easily than cooled, hardened burnt deposits.
Conclusion
The next time you face a heavily burnt baking tray, skip the chemical cleaners and reach for baking soda and white vinegar instead. This pantry-based solution transforms stubborn burnt residue removal from a dreaded chore into a manageable task requiring minimal scrubbing. Your baking trays will thank you, and you’ll appreciate the simplicity and effectiveness of this natural cleaning method that’s been trusted by home bakers for generations.


Leave a Comment