
The transformation is nothing short of remarkable. What looked like permanently stained, darkened grout between your bathroom tiles or kitchen backsplash suddenly brightens and gleams. The culprit behind this dramatic change? Three everyday ingredients that cost pennies and sit in most household pantries right now. No expensive professional cleaners. No toxic fumes. No hours spent on your hands and knees with a toothbrush. Just a quick, effective solution that makes grout look renewed in a fraction of the time you’d expect.
Why Grout Gets So Dirty
Before diving into the cleaning solution, it’s worth understanding what you’re actually fighting against. Grout—that porous material between tiles—is essentially a magnet for dirt, moisture, and mildew. Your bathroom becomes a humid breeding ground for mold and mildew spores. Your kitchen grout collects grease splatters and food particles. Even your entryway grout attracts tracked-in dirt and dust that settles into the microscopic pits and crevices of the grout surface.
The problem compounds over time. A light dusting of dirt becomes embedded grime. Mildew takes hold and spreads. Soap scum builds up in layers. Before you know it, your grout has transformed from a neutral, pale color into something that looks gray, brown, or even black. Many homeowners assume this discoloration is permanent and either resign themselves to living with it or start researching expensive professional grout cleaning services that can cost hundreds of dollars.
The good news? In many cases, this stubborn appearance is misleading. Much of what looks like permanent staining is actually a layer of surface grime that responds beautifully to the right cleaning approach.
The Three Magic Ingredients
Your grout-cleaning breakthrough relies on three simple components that work together to attack grime from multiple angles. The first ingredient is baking soda—a gentle abrasive that provides just enough grit to lift dirt without damaging grout. The second is white vinegar—an acid that dissolves mineral deposits, cuts through grease, and kills mold and mildew spores. The third is hydrogen peroxide—an oxidizing agent that brightens discoloration and sanitizes the surface.
What makes this combination so effective is that these three ingredients complement each other perfectly. Baking soda provides the scrubbing action. Vinegar brings chemical cleaning power. Hydrogen peroxide adds a whitening and disinfecting boost. Together, they create a cleaning solution that rivals commercial products without any of the harsh chemical concerns.
The beauty of this approach is simplicity itself. You’re not mixing hazardous compounds or creating potentially dangerous chemical reactions. You’re combining three substances so safe that people use them individually for cooking, cleaning, and personal care.
Creating Your Grout-Cleaning Paste
Making the solution requires no special equipment or skills. Start by pouring about half a cup of baking soda into a bowl. Add roughly three tablespoons of hydrogen peroxide—the standard three-percent variety you’ll find in any drugstore. Stir these together until you’ve created a thick paste with a consistency similar to peanut butter. The paste should be thick enough to cling to the grout lines without running or dripping.
If your paste seems too thin, add a bit more baking soda. If it’s too thick and difficult to work with, add a small amount of additional hydrogen peroxide. You want something spreadable but substantial enough to stay where you apply it.
Save the white vinegar for the next step. You’ll spray it directly onto the grout after applying your paste, and the chemical reaction between the vinegar’s acidity and your paste’s alkalinity creates additional cleaning action.
The Application Process
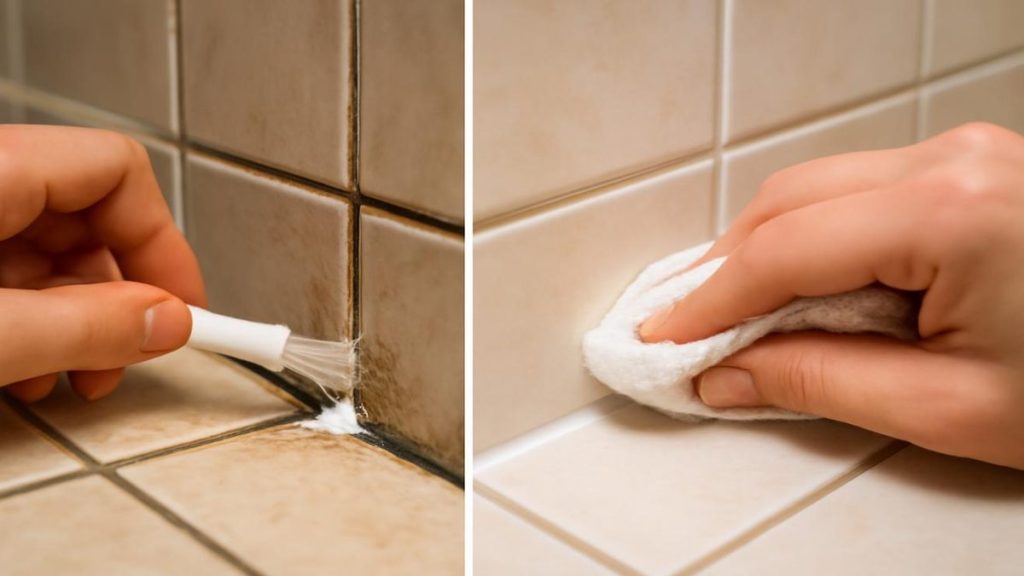
Using an old toothbrush, a grout brush, or even a small paintbrush, apply your paste directly to the grout lines you want to clean. Work systematically across your tile area, ensuring you’ve covered all the grout. Don’t be shy with the application—you want a visible layer of paste sitting on and in the grout.
Now comes the chemistry magic. Spray your grout lines generously with white vinegar. You’ll immediately notice fizzing and bubbling as the vinegar reacts with the baking soda. This fizzing action is what helps lift stubborn grime from within the porous grout structure. It looks like a science fair volcano experiment, which is both satisfying to watch and highly effective.
Let the mixture sit for approximately 10 to 15 minutes. This waiting period is crucial—it allows the chemical reaction to work its way into the grout and break down accumulated dirt, mold, and mineral deposits. You don’t need to do anything during this time except perhaps admire how the paste works.
Finishing Strong
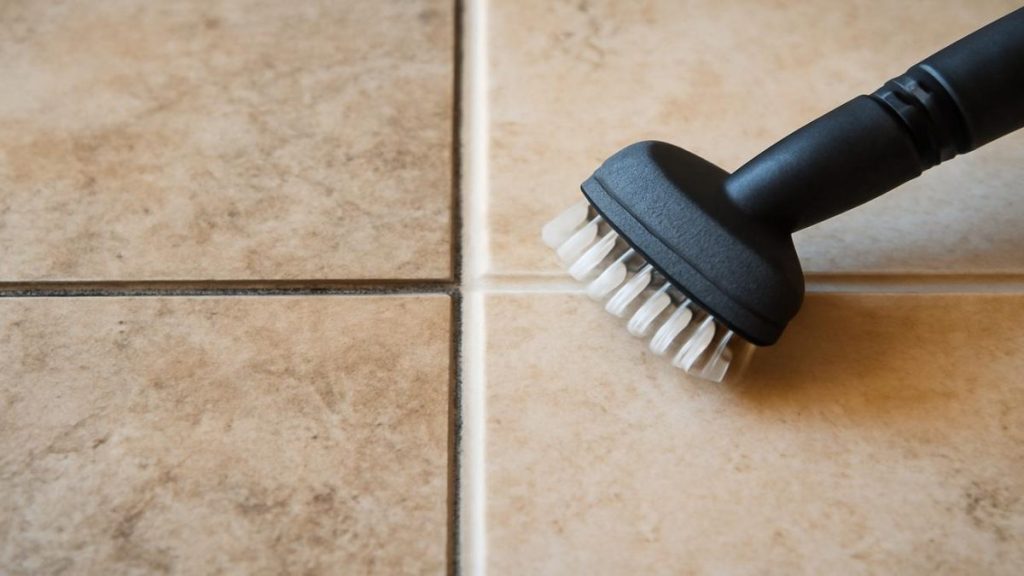
After your waiting period expires, use a damp cloth or soft-bristled brush to scrub the grout lines gently. You’ll be amazed at how easily the grime lifts away. Most of the heavy lifting has been done by your three-ingredient paste; the scrubbing is mainly about removing loosened debris and the paste itself.
Rinse thoroughly with clean water, wiping away all traces of paste and residue. A damp cloth works well for this final cleaning stage. Some people prefer using a spray bottle filled with clean water for a more thorough rinse.
Step back and admire your work. Grout that looked permanently stained now appears bright, clean, and renewed. The transformation typically justifies the minimal effort invested.
Why This Method Outperforms Alternatives
Commercial grout cleaners often contain harsh chemicals like bleach or ammonia. Beyond the health concerns associated with these substances, they can actually damage grout over time and create environmental hazards in your home. Your three-ingredient solution provides comparable or superior results without these drawbacks.
Professional grout cleaning services typically charge between $200 and $500 per visit, depending on the area being cleaned. Your homemade solution costs just a few dollars, even if you need to purchase any of the ingredients.
Making This a Regular Practice
The best part about this method is how easily you can maintain your grout going forward. A monthly application keeps grout bright and prevents heavy buildup from accumulating. Many people find that ongoing light cleaning with this paste is far more pleasant than tackling years of heavy grime accumulation all at once.
Your tiles will continue looking fresh, your grout will remain vibrant, and you’ll have the satisfaction of knowing exactly what cleaning agents are being used in your home. That’s a winning combination that beats expensive alternatives every time.


Leave a Comment